 If your team is attending an event in real life (aka #IRL), preparing for it can be a beast.
Use your calendar to keep your team organized and prevent them from becoming overwhelmed.
Having an event calendar that keeps track of every single moving piece adds that extra peace of mind.
Why?
Because everything is all in one place, you know you’ll nail every deadline, and you’ll work super efficiently.
So… where should you start organizing your event calendar?
Use this guide as the starting point—almost like a checklist—for the next time you’re planning to attend an event.
Navigate Your Pre-Event Preparations Process
The first part of your event preparations process involves knowing all tasks you need to complete before the day of the event.
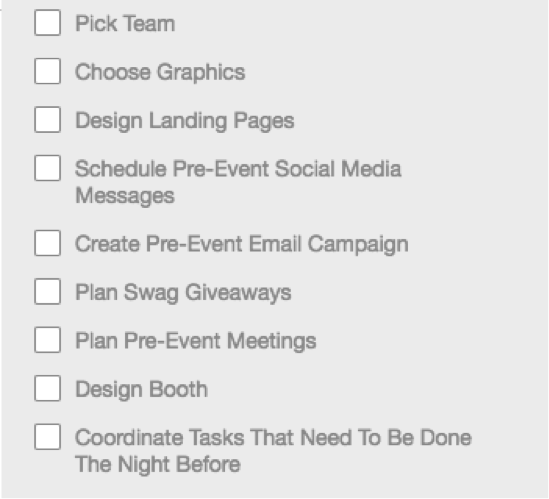
Create Your Master Event Calendar To-Do List
This list should include everything your team needs to complete from start to finish.
You can organize your task lists even more by dividing them up by pre-, post-, and during-event lists:
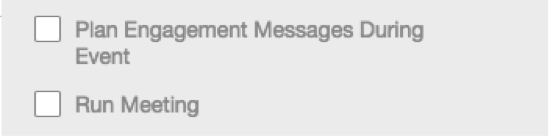
During-event checklist:
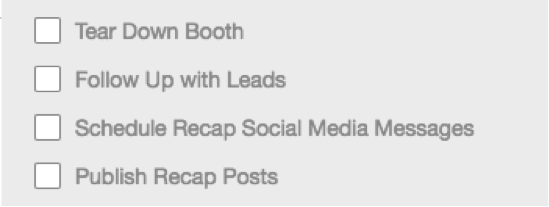
Post-event checklist:
To Complete: Create pre-event, during-event, and post-event checklists of every project your team needs to complete to attend the event. Assign a completion date to each.
Choose Your Team
Determine who will be on your content creation team, mainly for pre-event projects:
- PR manager/event planner
- Copywriter
- Graphic designer
- Social media manager
Then determine who will be on your traveling team at the event:
- Sales team members
- PR manager
- Product specialist
To Complete: Think about the content you’ll create as part of the event, and choose the team members who will complete the work.
Choose Your Graphics
Some common things you’re going to need your team to design are:
- Posters
- Social media images
- Landing page graphics
- Handouts
- T-shirt design (or any other swag design)
There are four major deadlines to determine which graphics you’re going to use at your event that should be on your calendar:
- Receive the graphics needs from the conference (if applicable)
- Schedule graphics brainstorming session
- Select graphics
- Send graphics to the event (if necessary)
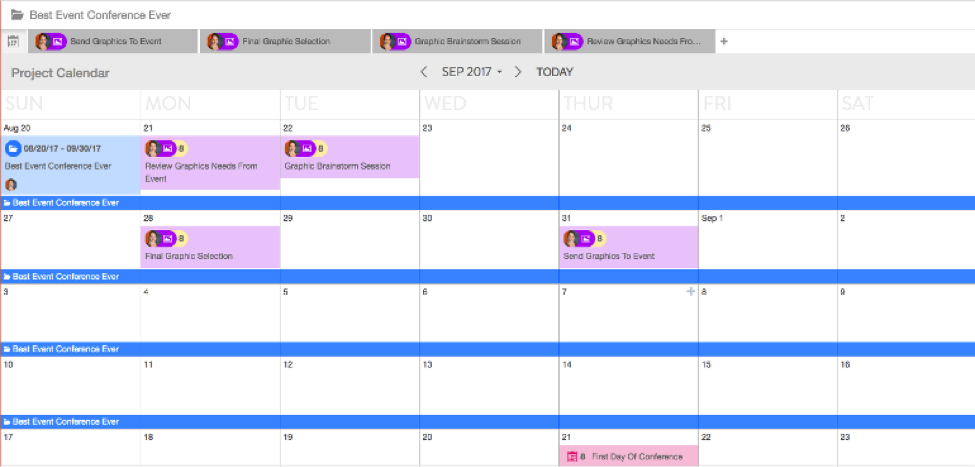
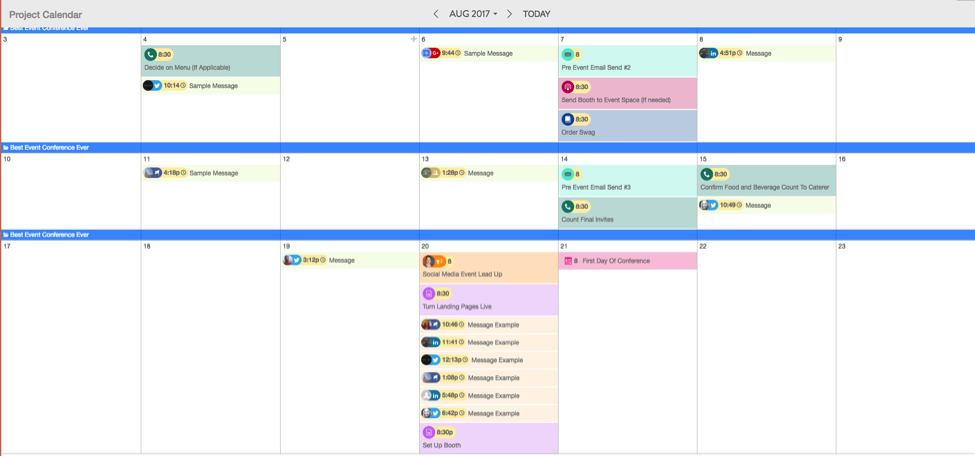
For example, the critical deadlines for graphics work are in purple.
This event is September 21st, so planning starts a month in advance.
To Complete: Choose graphic designers and assign deadlines.
Design Your Landing Pages
Landing pages help attendees find information like booth location, swag giveaways, and how they can interact with your team #IRL at an event.
There are six deadlines to determine:
- Schedule brainstorming session
- Write the copy
- Design the landing page
- Review the initial page
- Review the final page
- Schedule page launch
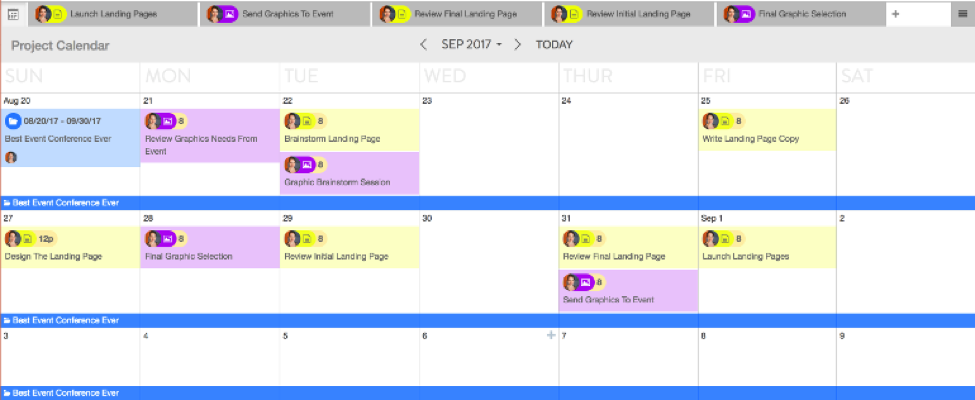
Schedule landing page deadlines (shown in yellow).
To Complete: Determine who will design your landing pages and who will write copy for said pages.
Schedule Your Announcement Social Media Messages
Establish how often you want to post leading up to the event:
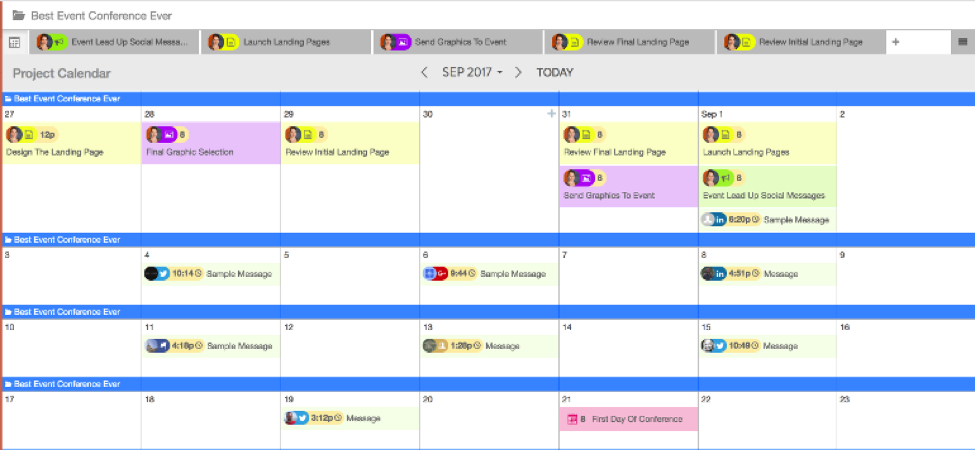
Schedule social media messages (shown in green) sparsely before the event date.
Increase the number of messages your team sends as you get closer to the event date:
Ramp up message sends before event date (shown in orange).
To Complete: Decide who is in charge of your social media messages, and set a deadline to write and edit them. Assign a graphics deadline to your designer.
Create Your Email Campaign
The final part of your pre-event setup is determining your pre-event email send schedule:
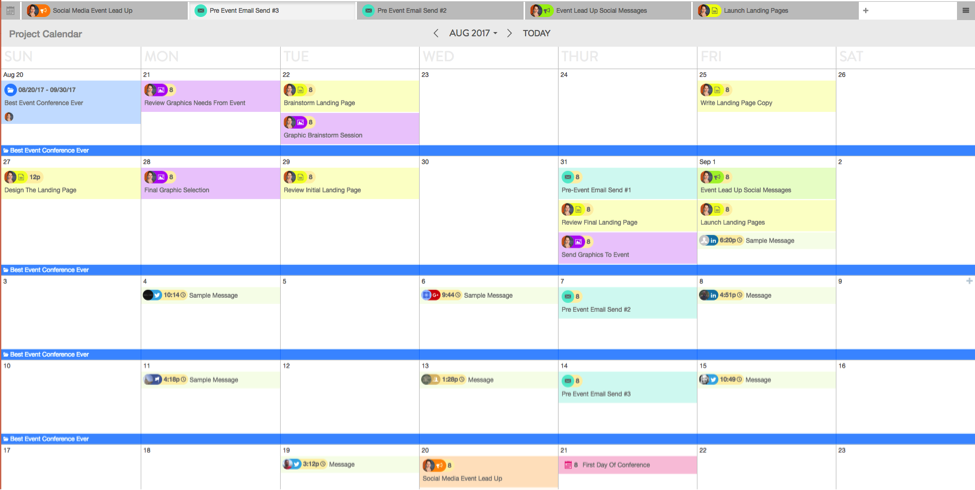
Schedule your email sends in your calendar (shown in teal).
To Complete: Choose your email copywriter and assign deadlines for each email sent.
Plan Your Awesome Swag Giveaways
There are three major deadlines you need to hit:
- Schedule swag brainstorm session
- Design graphics
- Order said swag
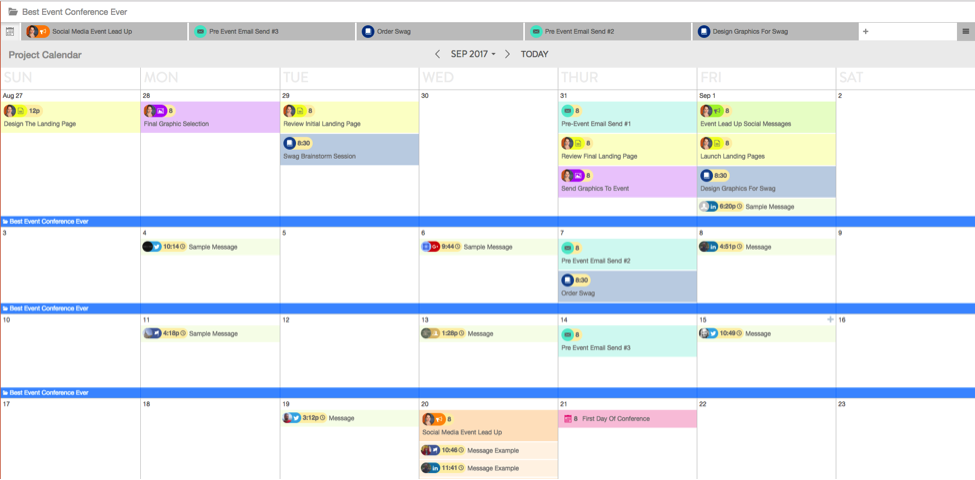
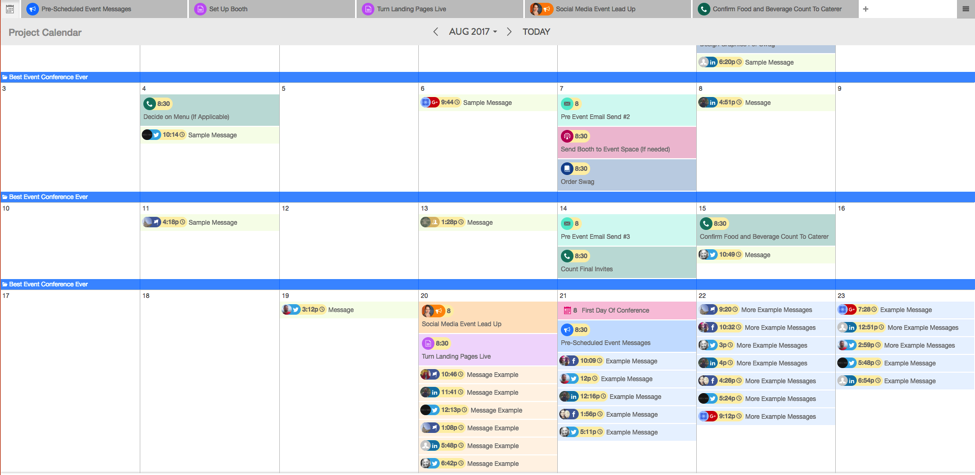
Schedule swag deadlines (shown in dark blue).
To Complete: Decide who will design swag (if needed) and who will order it.
For example, here’s some swag from our last conference at Confab:

Plan Your Pre-Event Meetings
This meeting could be for a happy hour, training, relationship management, or product education.
Deadlines for this project include:
- Brainstorm where and when your meeting will take place
- Contact event space
- Confirm event space
- Decide who to invite
- Send invites
- Determine menu (if applicable)
- Count final invites
- Verify food or beverage count to caterer (if applicable)
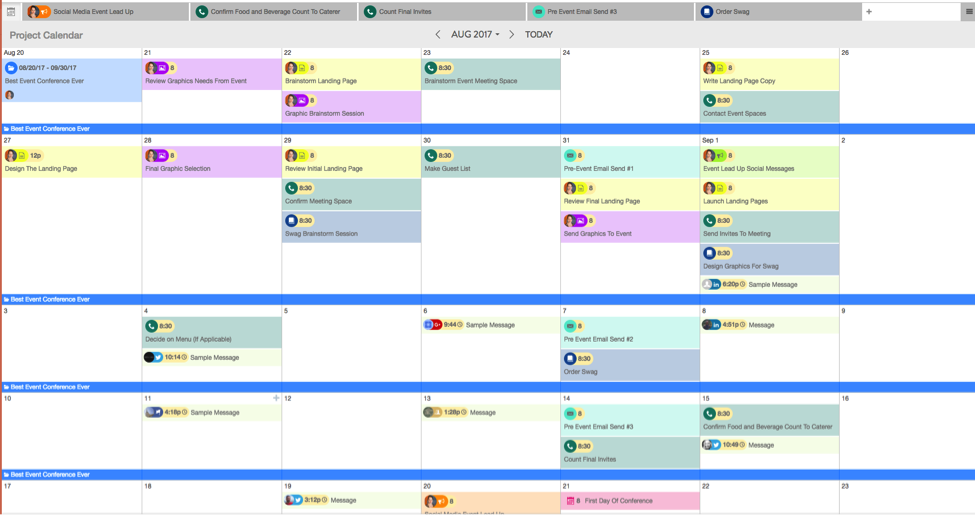
Notice how spaced out those dark green boxes are?
Your meeting planning session is going to take a bit of time to complete because you need to gather information from your customer base.
To Complete: Decide who your meeting coordinator is and assign deadlines.
Decide What Your Booth Will Look Like
Booths are another huge part of your pre-event preparations checklist.
Add these deadlines to your calendar:
- Receive booth guidelines from the event (when applicable)
- Brainstorm booth look
- Finalize booth look
- Order parts for booth
- Send to convention center (if needed)
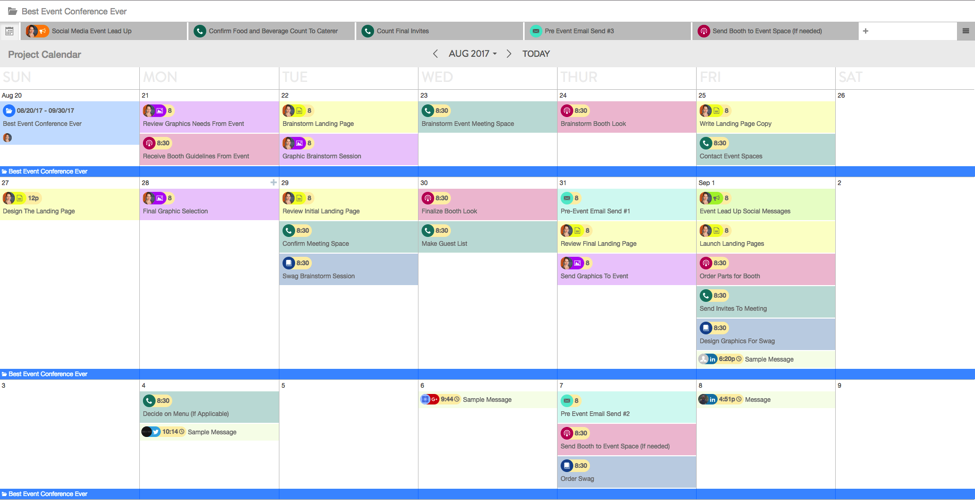
Schedule booth design deadlines in your calendar (shown in dark pink).
To Complete: Choose the designer who will create the booth and complementary materials. Determine who is in charge of shipping the materials to the event location.
Plan What You’ll Do During The Event
Events are busy, so it’s easy to have small details slip through the cracks.
Having a checklist in your calendar ensures your team avoids a slip-up.
Coordinate Everything You Need To Do The Night Before
There are things on your during-event checklist you can do the night before (or the morning of), including:
- Set up your booth
- Turn landing pages live
Create an event in your calendar to keep track of those small details:
Create events in your calendar to act as a reminder for your team (shown in light purple).
To Complete: Determine who on the traveling team is in charge of making sure the booth is set up, and who on your content creation team will launch the landing pages.
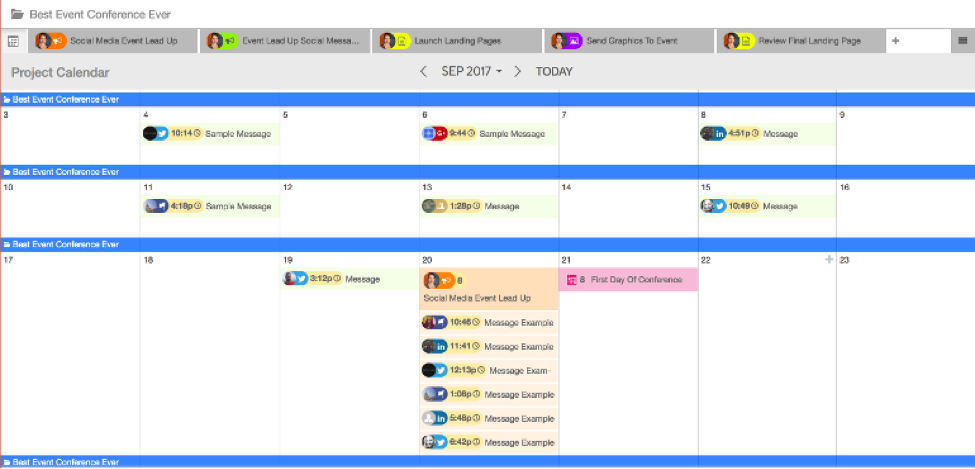
Plan Your Engagement Social Messages During The Event
You will also be able to send live messages during the event, but it helps to look at a list of scheduled speakers and events and plan some messages.
Pre-schedule some of your event messages (shown in blue).
To help your social media specialist pre-write content, look at the final event schedule and create messages around speakers, timeframes, themes, and more.
To Complete: Have your social media specialist write all messages.
Run A Flawless Pre-Event Meeting
Your on-location team will host the pre-event meeting (like a happy hour or training) typically the day before the larger event.
Use your calendar to keep track of your meeting details:

Put your meeting schedule right into your calendar, so your team knows things such as dinner start time, guest arrival time, and so on (shown in light pink).
To Complete: Have your meeting coordinator create a timeline and add this to your event calendar.
Plan Your Post-Event Checklist
Your team is almost ready to head home, but did you know your event calendar can help with those final closing steps to button everything up without a hitch?
Set Time To Tear Down The Booth
Use your calendar to set a reminder for your team to tear down your event booth.
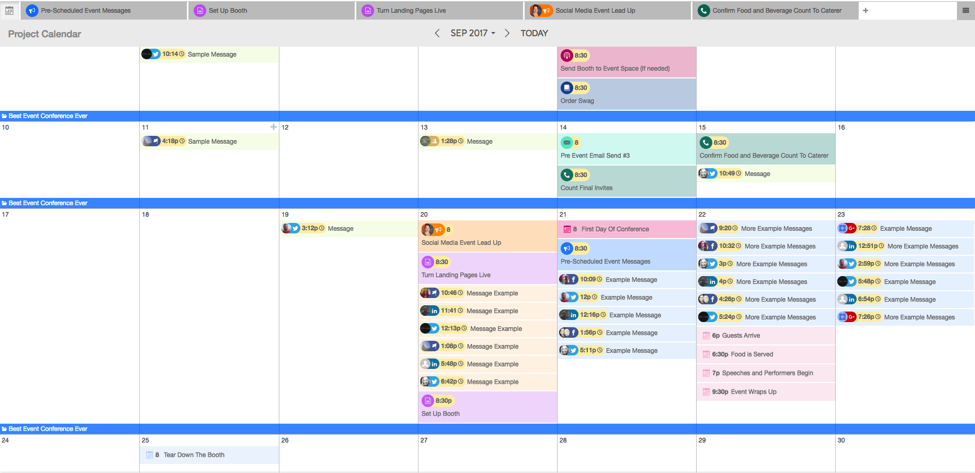
Schedule an event in your calendar to tear down the booth (shown in light blue).
To Complete: Check with event management to confirm what time your booth needs to be down and out of the space.
Follow Up With The Leads You Collected
Schedule a day in your event calendar to have your sales teams follow up with the leads you collected at the event.
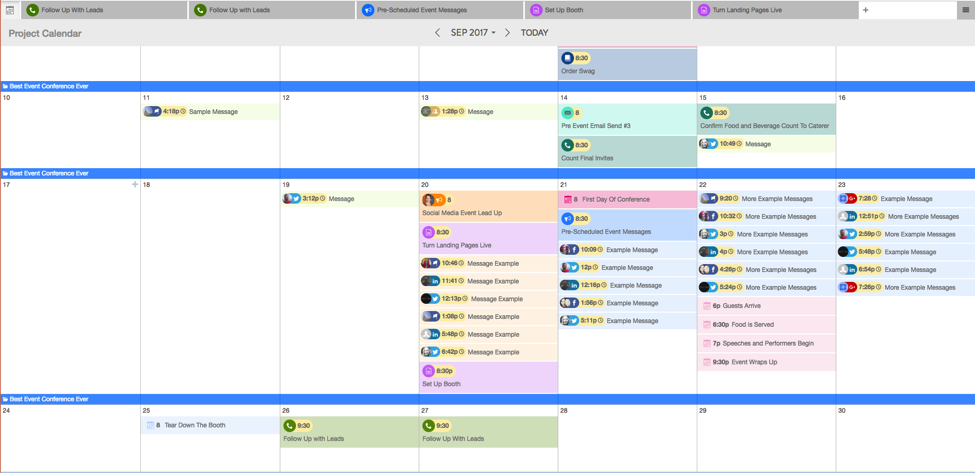
You can go through your leads all at once or space them out depending on how long your conference (shown in military green).
To Complete: Assign leads to sales team members.
Schedule Your Recap Social Media Posts
Use your event calendar to remind your team to send out your social media recap messages to capitalize on the event hashtag.
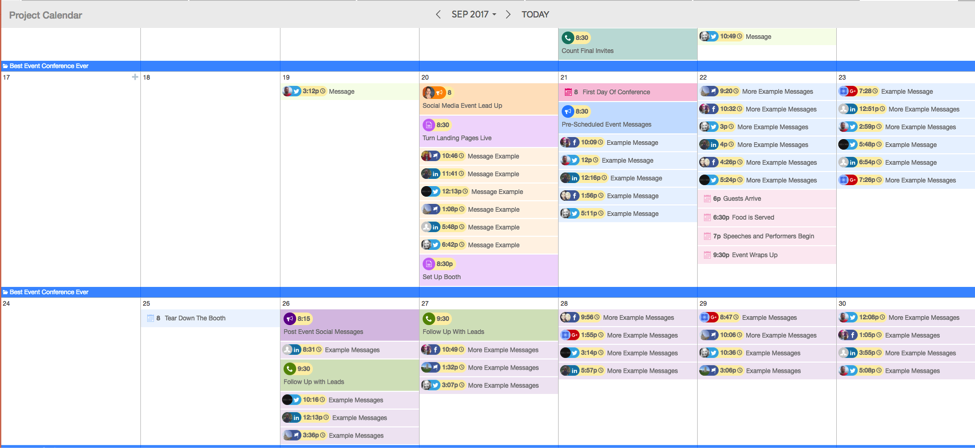
Your social media recap messages should start the minute the event is over and go no longer than a week after it ended (shown in dark purple).
To Complete: Work with your social media manager to write posts while you’re still attending the conference.
Publish Your Recap Blog Post
Use your blog to recap the event your team attended and highlight the major points your team took away from it.
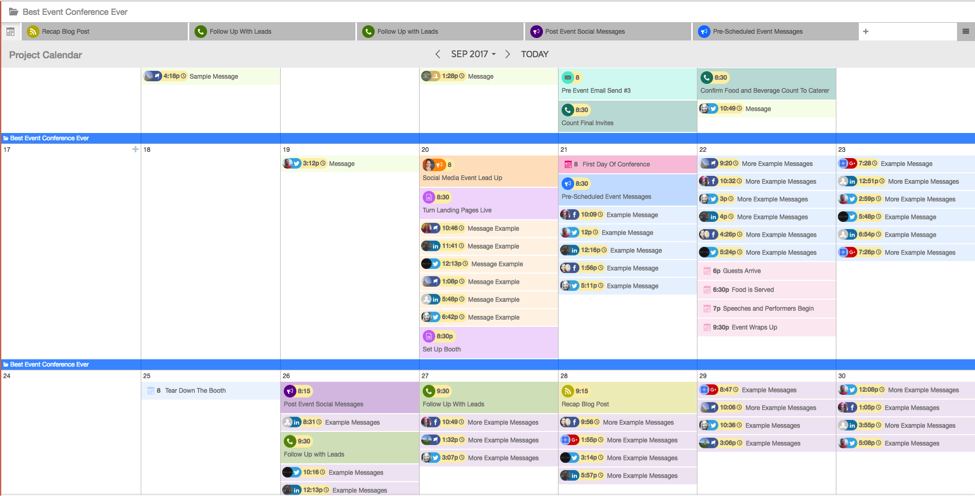
Your blog post needs to be timely, but give your content writer time to draft content (shown in gold).
To Complete: Work with your content writer to recap highlighted events. Publish your blog post no later than a week and a half after the event ended.
Takeaways
- Your calendar is a powerful tool when it comes to organizing your event planning process.
- Don’t mess around with five different apps or organizers to get your team ready for an event. Have it all in one place.
- Hold your team and yourself accountable to the deadlines you set in your calendar.
How do you organize your event preparation process?