Today’s guest post is written by John Fitzgerald.
A sizzle reel is a short promotional video. It can be used to promote just about anything and can include virtually any type of media – video, print, websites, photos, and radio sound bites.
Typically a sizzle reel is something the ad agency does when submitting for an award or pitching new business. But a PR firm can do the same.
In order to create a smooth collaboration between the PR department and the video editor who is hired to assemble the sizzle reel, I’ve created six steps to apply to any type of video project.
What’s the point?
Sizzle reels can highlight the success of a new strategy, a new brand, a new PR team (or all of the above). Be sure to convey this reason and any relevant metrics to the video editor.
This sizzle reel for wine brand Black Tower – produced by Deussen Global – highlights the success of a specific six-month campaign and includes clips from print, web, and broadcast TV. It is loaded with metrics, which tie the piece together nicely.
Find examples you like.
There are many elements that go into a good sizzle reel – music, pacing, graphics, length, and more. Find some examples of what you like and share them with your editor.
This is an example of a reel for Van Gogh Vodka’s newest flavor, PB & J.
What do you think of the pacing, music, etc? Would it fit your brand?
Find your video clips.
The foundation of a good sizzle reel is video. And most of the video will likely consist of video clips from TV broadcasts. If you work in a PR department, you probably already work with a media clipping service.
Have the service provide you with video clips that are 480p. This is the size of an image on an older standard definition TV or a DVD. You may be able to get clips that are at an HD size of 720p or 1080p, but you’ll likely pay a fee for higher quality clips.
My advice: Stick with 480p. If you’re looking for a cheap and easy way to download YouTube videos, try the Video Download Helper plugin for Firefox.
Organize your clips.
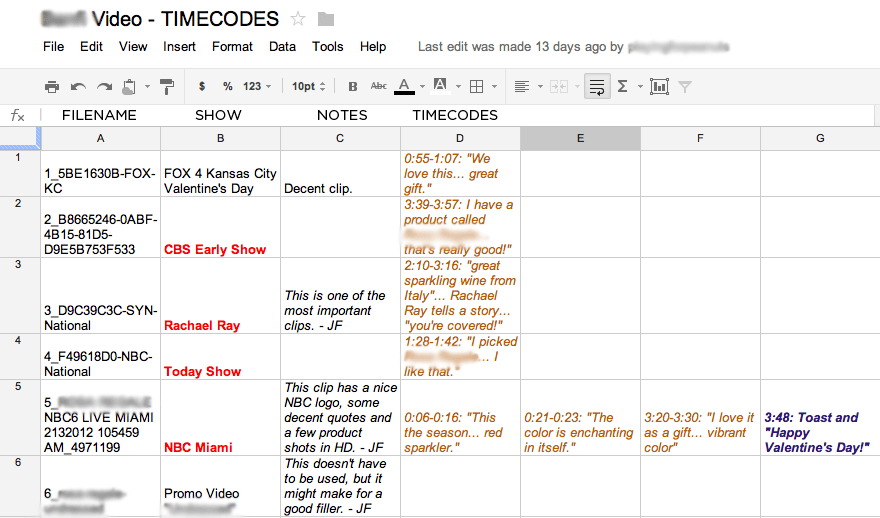
Provide your editor a spreadsheet like the example below that includes a list of your print, web, and video clips. Highlight the clips you feel are most important.
For video clips, you should always try to include the time codes that correspond to important moments in the video. This will save lots of time (and money) during the editing process!
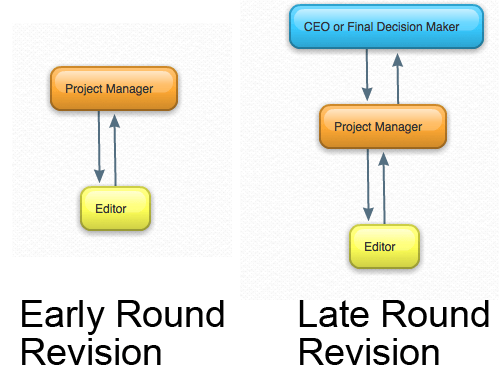
Establish a clear revision and approval process BEFORE editing begins.
The importance of a clear revision process cannot be understated. When the video editor delivers the first rough cut, that video should ONLY be seen by the people who are making the decision. DO NOT show the video to everyone in the office or else the video will be subject to dozens of sometimes conflicting notes from people that are not familiar with the overall goals and scope of the project.
A rough cut should be watched again and again and again. Watch it on multiple computers. Watch it with headphones and with regular speakers. Watch it on your phone and on your laptop and iPad. Only when you are sure you know the video inside and out, will you be ready to give the notes that will guide the next round of revisions.
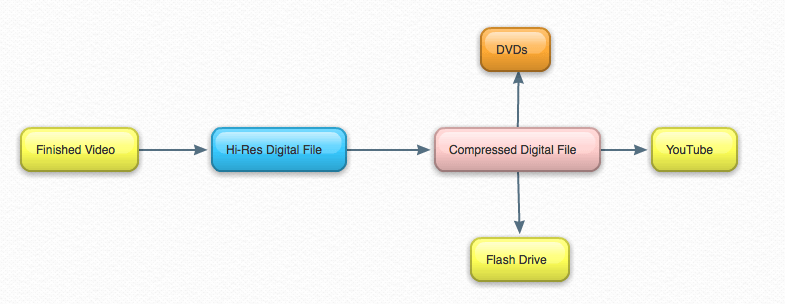
Agree on the delivery and distribution process BEFORE editing begins.
Once the video is approved, it will have to be delivered in a variety of formats. Similar to the approval process outlined above, it’s always best to know what formats are going to be needed BEFORE the editing process begins.
Do you do sizzle reels to either show your results or pitch new business? What tips do you have?
NP5G9VS73GCF
John Fitzgerald is a producer/editor and the president of Harlem Line Media. You can follow him on Twitter @fitzternet.


