 We’re switching things up a bit this week, and you’re getting your blog checklist content a day early.
That’s because we have a special surprise coming later this week and I wasn’t quite, quite ready to announce it this morning.
But never fear! We’re going to talk today about how to optimize your content before you get ready to hit publish.
If you’ve missed the first half of this series, we’ve talked about how to write for humans and how to write for robots.
The last piece (next week) will be how to promote your content, once it’s published.
For now, let’s work on optimizing it.
(And I’ll be back tomorrow with your surprise.)
Blog Checklist: Optimize Your Content
Now it’s time to optimize your content and make it easy for people to comment on and share it.
You still have not published your content—you have a few more steps to take.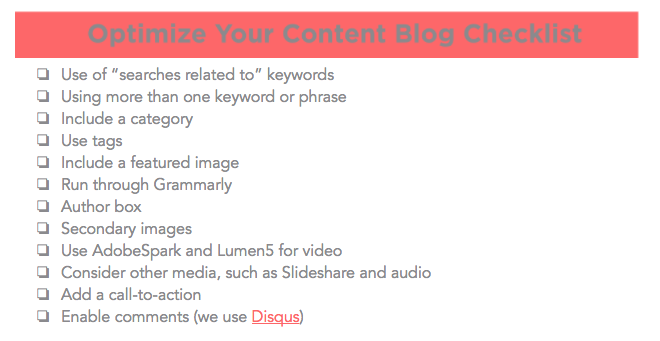
I know, I know. It seems like a lot. But I promise, other than the writing part, the rest takes only a few minutes.
Especially once you get the hang of it.
It’s taken me far longer to write this series than it will take you to do everything you need to for 20 or more articles.
Blog Checklist #1: Searches Related To…
Using your keyword, go to Google and do a search. I’m going to use “blog checklist” as my keyword because, well, it’s my keyword for this article so I may as well do this work alongside you.
Scroll to the bottom of the first page.
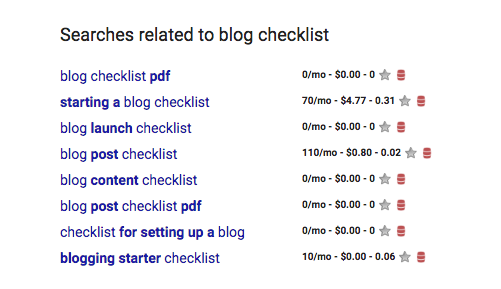
You’ll see a box that says “searches related to” and then your keyword.
These are the other things people search when looking up your topic—and now you have a list of keywords/phrases to include in your content.
For instance, I could add “blog content checklist” and “blog post checklist” in here. It also would make sense to use “checklist for setting up a blog” in this article.
The point is to use the phrases people use when researching your topic so you’ll show up when they search.
Which leads us to the next blog checklist point…
Blog Checklist #2: Use More than One Keyword
If you do decide to add some of the phrases in the “searches related to” box, you can just add it a couple of times in the content or you can add it as a second (and third and fourth) keyword.
In Yoast, you can add a keyword. You can see below that I have my blog checklist keyword and I’ve added blog content checklist from the “searches related to” box.

Just like your first keyword/phrase, you have to do the SEO work to make sure it’s included in the searches. Add as many (or as few) as you like.
But don’t go crazy. You want to publish the best page on the internet for your topic. Don’t confuse Google with a bunch of keywords to target, or make your page look spammy and gross.
Blog Checklist #3: Categorize and Tag Your Content
I recently saw the best explanation on how to categorize and tag your content.
The categories are like the table of contents—there are very few of them and all of your content fits into one of them.
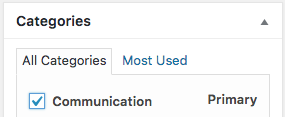
For instance, ours are communications, social media, marketing, and entrepreneurship. Everything we publish fits into one of those four categories.
The tags, then, are like the index. You want people to be able to easily find everything you’ve published on one topic, such as Facebook, media relations, crisis communications, chicken, cupcakes, chocolate, or people’s names.
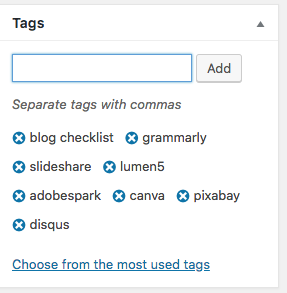
You don’t want to add a bunch of tags just to do it. If you think of them as your index, it makes it a lot easier to decide what to include.
Tags also make it easy for people to search your site, so consider what they’d search to find a specific piece of content.
Blog Checklist #4: Include Featured and Secondary Images
The featured image does a few things:
- Pulls an image for your email and your social media efforts
- Allows anyone sharing your content to automatically share an image
- Creates easy social media images for CoSchedule, Buffer, Hootsuite, or other management platform
- Adds an image to the home page of your content so it’s visually appealing
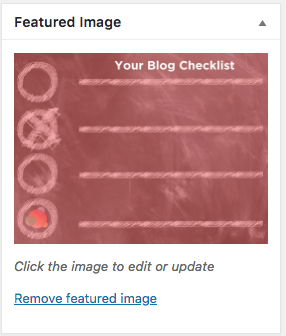
And it does it all automatically so you don’t have to worry about adding it in all of these spots. You just include it in the featured image box and you’re good to go.
The advantage to having secondary images is two-fold:
- Breaks up the copy and makes the content more visually appealing; and
- Provides more than one option for your social media images (which I love).
Blog Checklist #5: Run Through Grammarly
Grammarly is my most favorite tool on earth. Well, maybe not my most favorite (I did ask CoSchedule to marry me, after all), but it’s up there.
I love it because it gives you a really good second set of eyes for free or almost next-to-nothing.
There are some cases where it tells you to change something and it’s wrong. You do have to use your critical thinking skills because it is just software, after all.
But it gives a nice sweep of things to consider adding or changing before you hit publish.
I recommend you use it for all of your content. In fact, a friend had a client answer interview questions for a reporter and they’d been plagiarized (eeeek!).
By running his email through Grammarly (before it was sent to the reporter), with the plagiarism check on, they were able to stop the email from going out.
It also allows you to have blackmail fodder on the client for life. “Oh, you want me to work this weekend? Remember that time you plagiarized your answers for a media interview?”
OK, maybe not, but it’s fun to consider.
Blog Checklist #6: Author Box
Lots and lots of people ask me what we use for the author’s bio at the end of our blog posts.
Easy!
It’s Better Author Bio. It’s just a plugin and it’s crazy easy to use.
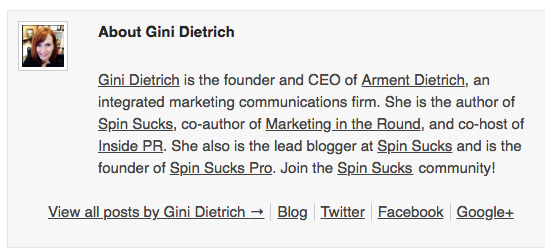
When you add a new user to the back-end of the website, you just add all of their information—bio, headshot, social media handles—and it automatically adds them at the bottom of the article they author.
You can do this with guest authors (like we do), subject matter experts, colleagues, and experts. It’s a nice way to present information about the author in a visual way.
Blog Checklist #7: Creating Images and Videos
There was a really good guest article on Spin Sucks a couple of weeks ago about how to create branded images for your content. I highly recommend you read it, if you missed it earlier.
You no longer need a graphic designer for your content and social media images and video. I recommend saving the experts for the pieces that will make you money or need to run at high resolution.
With the use of Pixabay and Canva, you can easily create images.
And with the use of AdobeSpark or Lumen5, you can easily create videos. In fact, once you have your account in Lumen5 set up, it will email you once a week with suggested videos to use—videos they’ve already created from the content you’ve created.
It’s pretty nifty. They always need some tweaking, but that’s far easier than trying to start from scratch. Videos work really well in content, and Facebook rewards your page when you upload them directly there.
Test it out and see what you think.
Blog Checklist #8: Include Other Media Types
Likewise, it’s always smart to include other media types, such as audio or SlideShare.
A few days ago, I tested a theory and crafted a “how I work” audio post. It took me about 20 minutes to record it and I just talked off-the-cuff (no preparation, whatsoever).
It just happened that I finished it and posted it in the PR Dream Team at 4:45 (that wasn’t strategic, but in retrospect, very smart).
People downloaded it and listed on their commute home and I had SO MANY comments about it that evening and the next day.
The next step, then, would be to include that in a piece of content that I publish here. It provides a new way of reaching audiences who may use commute or dog walking or exercise time to catch up on work-related professional development.
Blog Checklist #9: Add a Call-to-action
One of the biggest mistakes most content marketers make is not having a call-to-action in their content.
It can be as simple as “subscribe” or it could be a content upgrade that leads them to something to download or it could be to schedule a call or take a demo.
What is it you want people to do?
Do you want them to stay on the site longer and learn more about you? If so, provide related content links that moves them through the site.
(This is how Content Marketing Institute gives you related content to keep you on their site forever and ever.)
Do you want them to download a piece of content? This series will become an eBook with a downloadable checklist you can keep on your desk. Once the series is complete, we’ll go into each piece and add the content upgrade. Which you’ll see here if you’re reading this after May 2018.
Figure out what you want readers/listeners/viewers to do and lead them down that path.
Never, ever forget to include a call-to-action.
Blog Checklist #10: Enable Comments
And the last thing in optimizing your content before publication is enabling comments.
There certainly is a lot of debate about whether or not you should allow comments on your content.
Unless you’re a major daily newspaper or a major consumer brand, I’d err on enabling them.
We use Disqus, which it makes it easy for both you and the visitor. You can easily moderate and keep spam and trolls to a minimum. And visitors can sign in any way that’s easy and convenient for them.
The whole point in creating content is to engage an audience—the good, the bad, and the ugly. If you shut down any opportunity to have conversation with people who might buy from you, you’re losing out on the magic of content marketing.
Enable the comments. It will be worth it. I promise.
It’s Not Cumbersome at All
You can see a lot of these things are done once and then they’re installed and ready to go.
Like writing for humans and for robots, it looks far more cumbersome than it is.
Once you get the habit down, it will take you less than 10 minutes per piece of content to do everything in this blog checklist—and the two before it.
Next week, we’ll talk about how to promote your content most effectively.
In the meantime, what questions do you have?